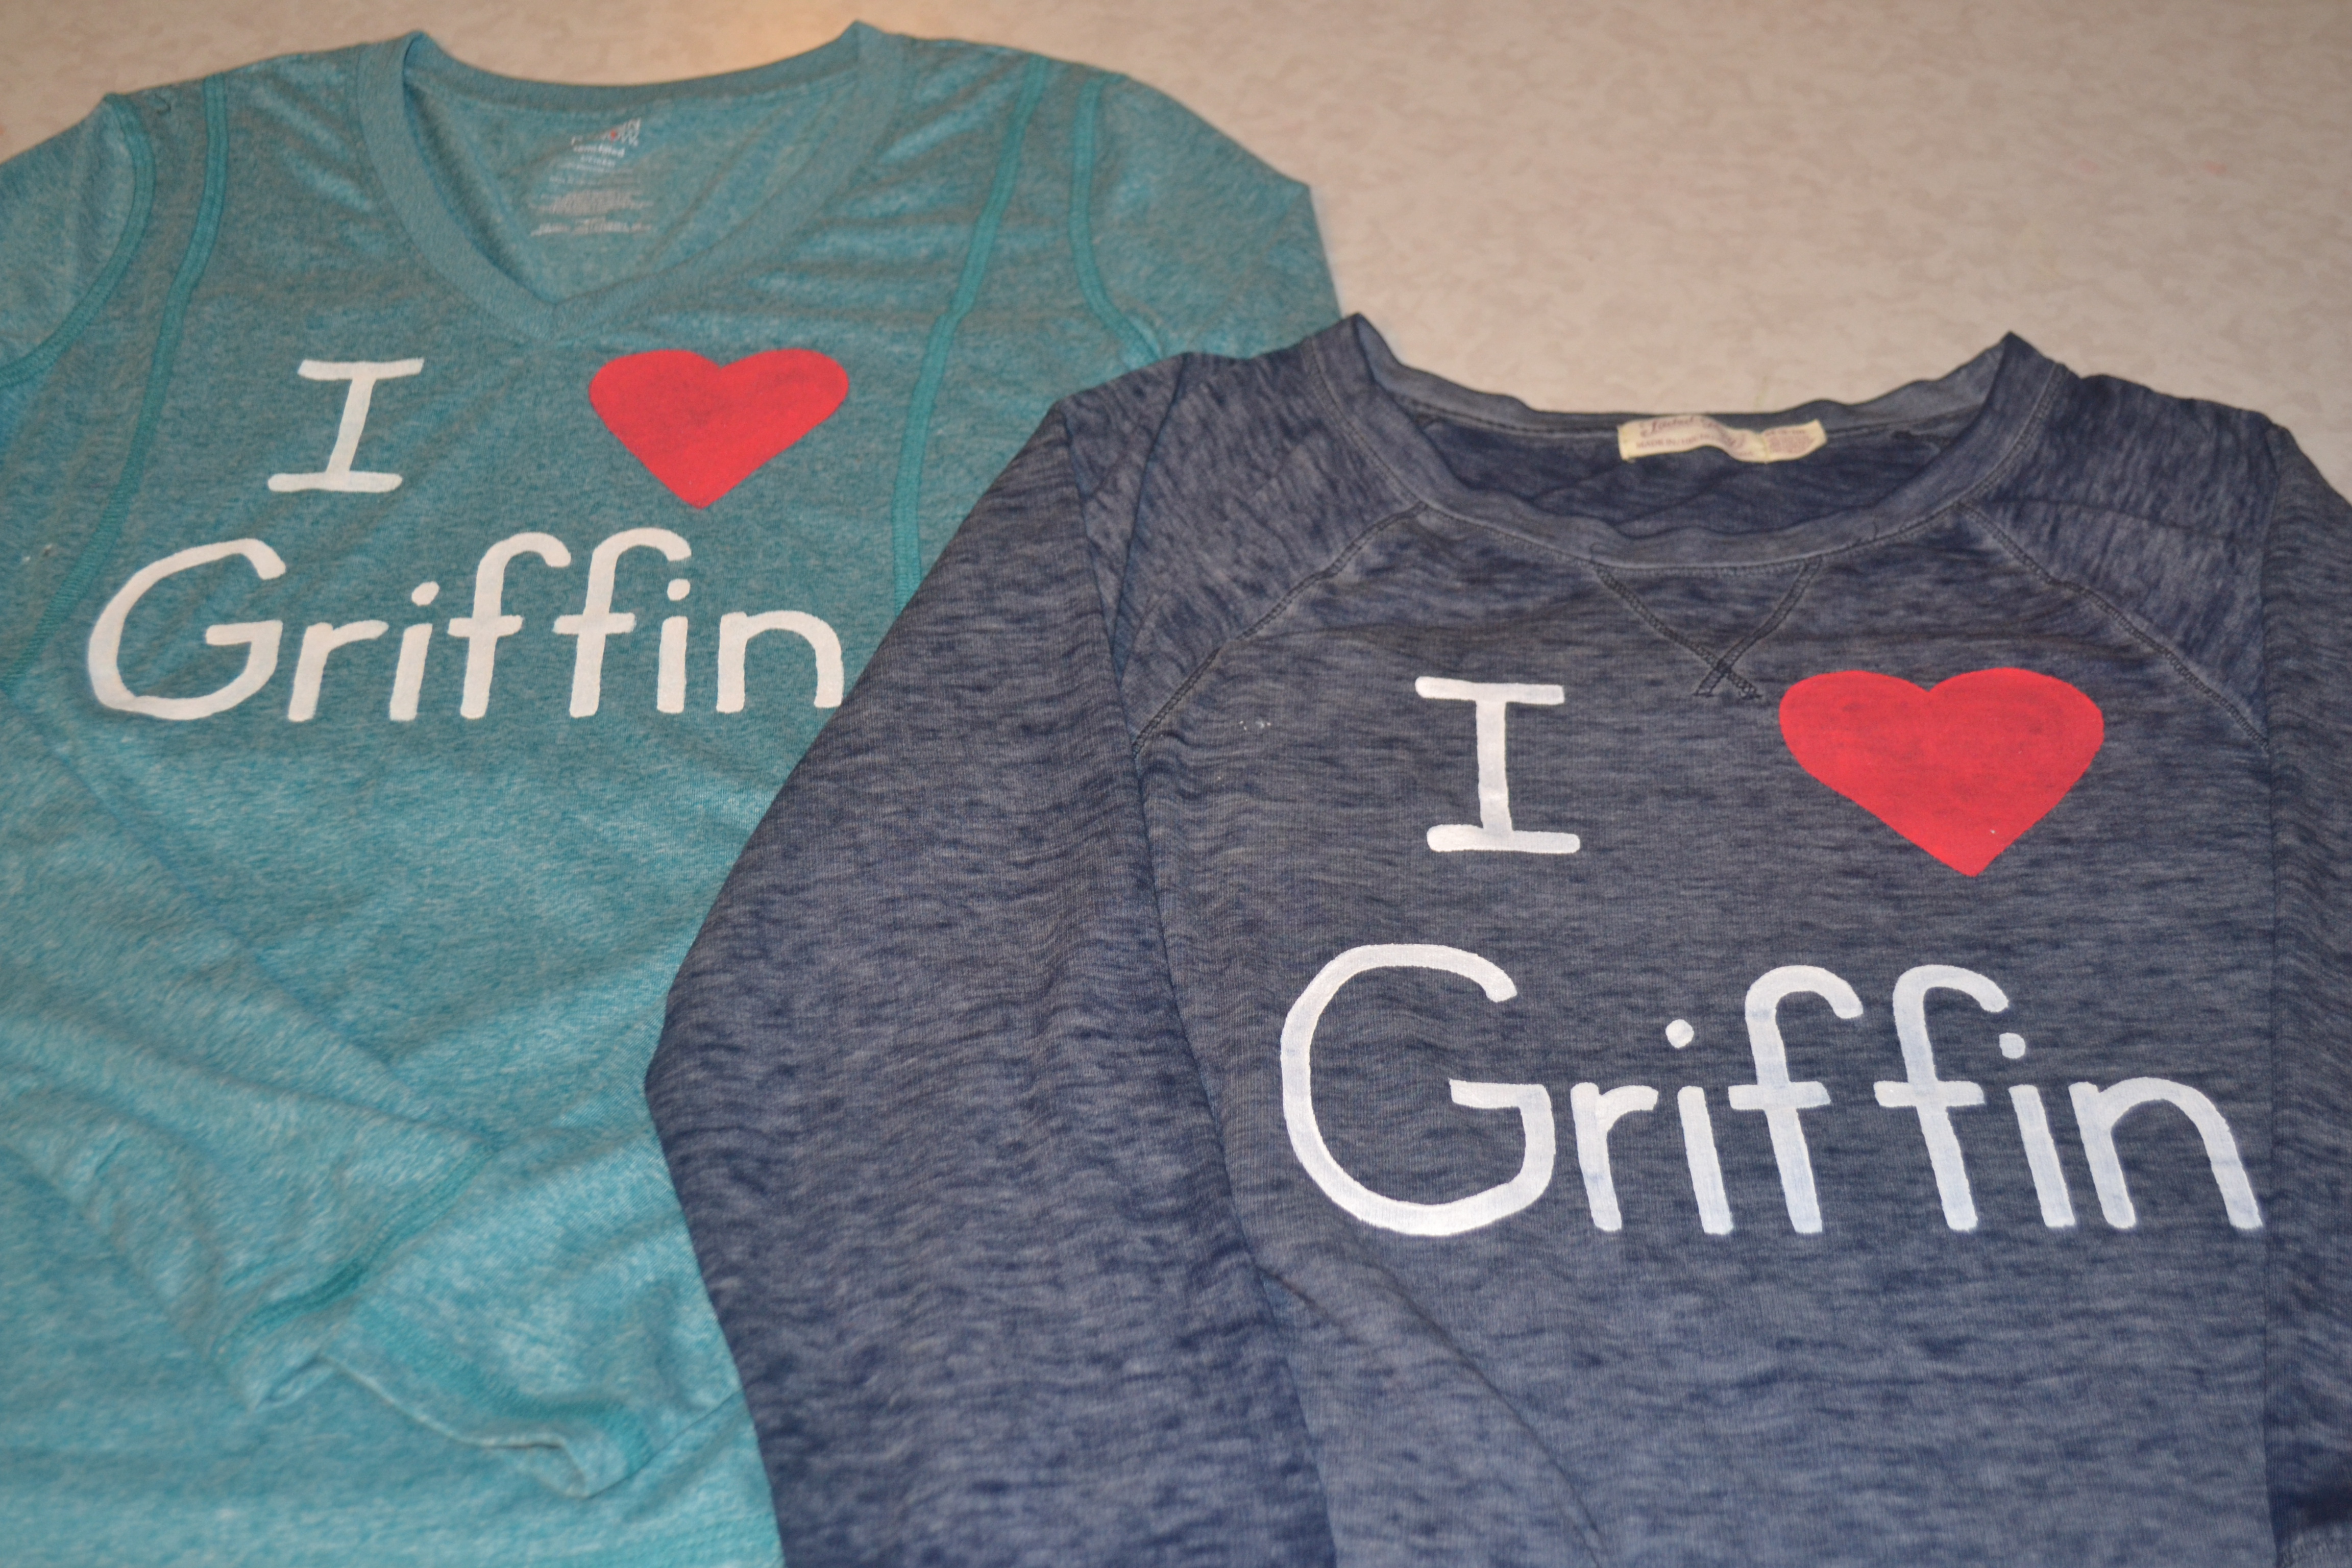
As a mom, I love my kids more than they will ever know. With this in mind, I decided that if I broadcasted my love for them on a t-shirt, they might see my love…and potentially be traumatized by it!
This great idea came to me when my son Cade, the oldest of our five kids, turned 13 this year. Unbeknownst to him, we all were wearing shirts that said I ‘heart’ Cade. As we sat down at the restaurant of his choice, we all took off our sweaters and proudly showed off our shirts! His face was bright red, but he was smiling. Well, I think that he was smiling!
An added bonus to making these shirts is that you can wear them to your children’s sporting events, school concerts, and even to just go grocery shopping! I can’t tell you how many people come up to me and tell me what a fun idea this is!
So, lets begin!
MATERIALS:
T-shirt (I’ve used cotton, cotton blends, etc. and had great results with all)
White, Black, and Red fabric paint…NOT puffy paint! (I buy mine at JoAnn’s Fabrics)
Paint brushes (the size of the brush bristles determines the width of the lettering)
Directions:
After buying your shirt, wash and dry it. If you paint the shirt before washing it, the lettering will pull against the fabric, making it look lumpy. (No one wants to look lumpy!) Next, place something between the front and back of your fabric…I used my husbands magazines! This will ensure that the paint doesn’t bleed through onto the back fabric.
Choose your paint colors. For light shirts, I use black paint, and for medium to dark shirts, I use white paint. I always use red for the heart. This is just my preference due to the fact that four of my five kids are boys and didn’t like the idea of pink hearts!
Paint your lettering. GO SLOW! I like to place a piece of tape across where my lettering will be to make sure that I keep the letters at the same level. After the lettering gets tacky dry…roughly 15 minutes, I do a second coat. This is especially important when painting with white paint. If you are nervous about your lettering, I do have one trick you can do. Start your lettering using a thin brush. This enables you to ‘mess-up’ a little, before going over the letters with the thicker brush. (When all else fails, find a friend who has a steady hand and bribe them with chocolate…thats how I end-up doing shirts for friends of mine!)
Let the shirt fully dry before wearing or washing. I usually wait 24 hours. After wearing the shirts, we wash them in cold water, and dry on our regular drier setting. If for some reason the lettering still comes out lumpy I throw it back in the drier to get warm, then I lay it on a flat surface with an encyclopedia on top of the lettering. The heat and the pressure of the book will help flatten it out.
This is a super easy and fun project. You will be amazed at how many people will comment on your shirt…seriously! The only downside is that when you make them for one of your children, suddenly they all want you to wear one for each of them!
My last tip is for those times when you are going to an event that more than one of your children are participating in. Two of my children wrestle in the same league. It is way to much work to wear one shirt, run to the bathroom and change, and then wear the other shirt, so that each boy can have me wearing their shirts. What I did was buy a long sleeved shirt, and on the front I painted I ‘heart’ Wrestlers, and down each sleeve I wrote each boys name! Problem solved!!!


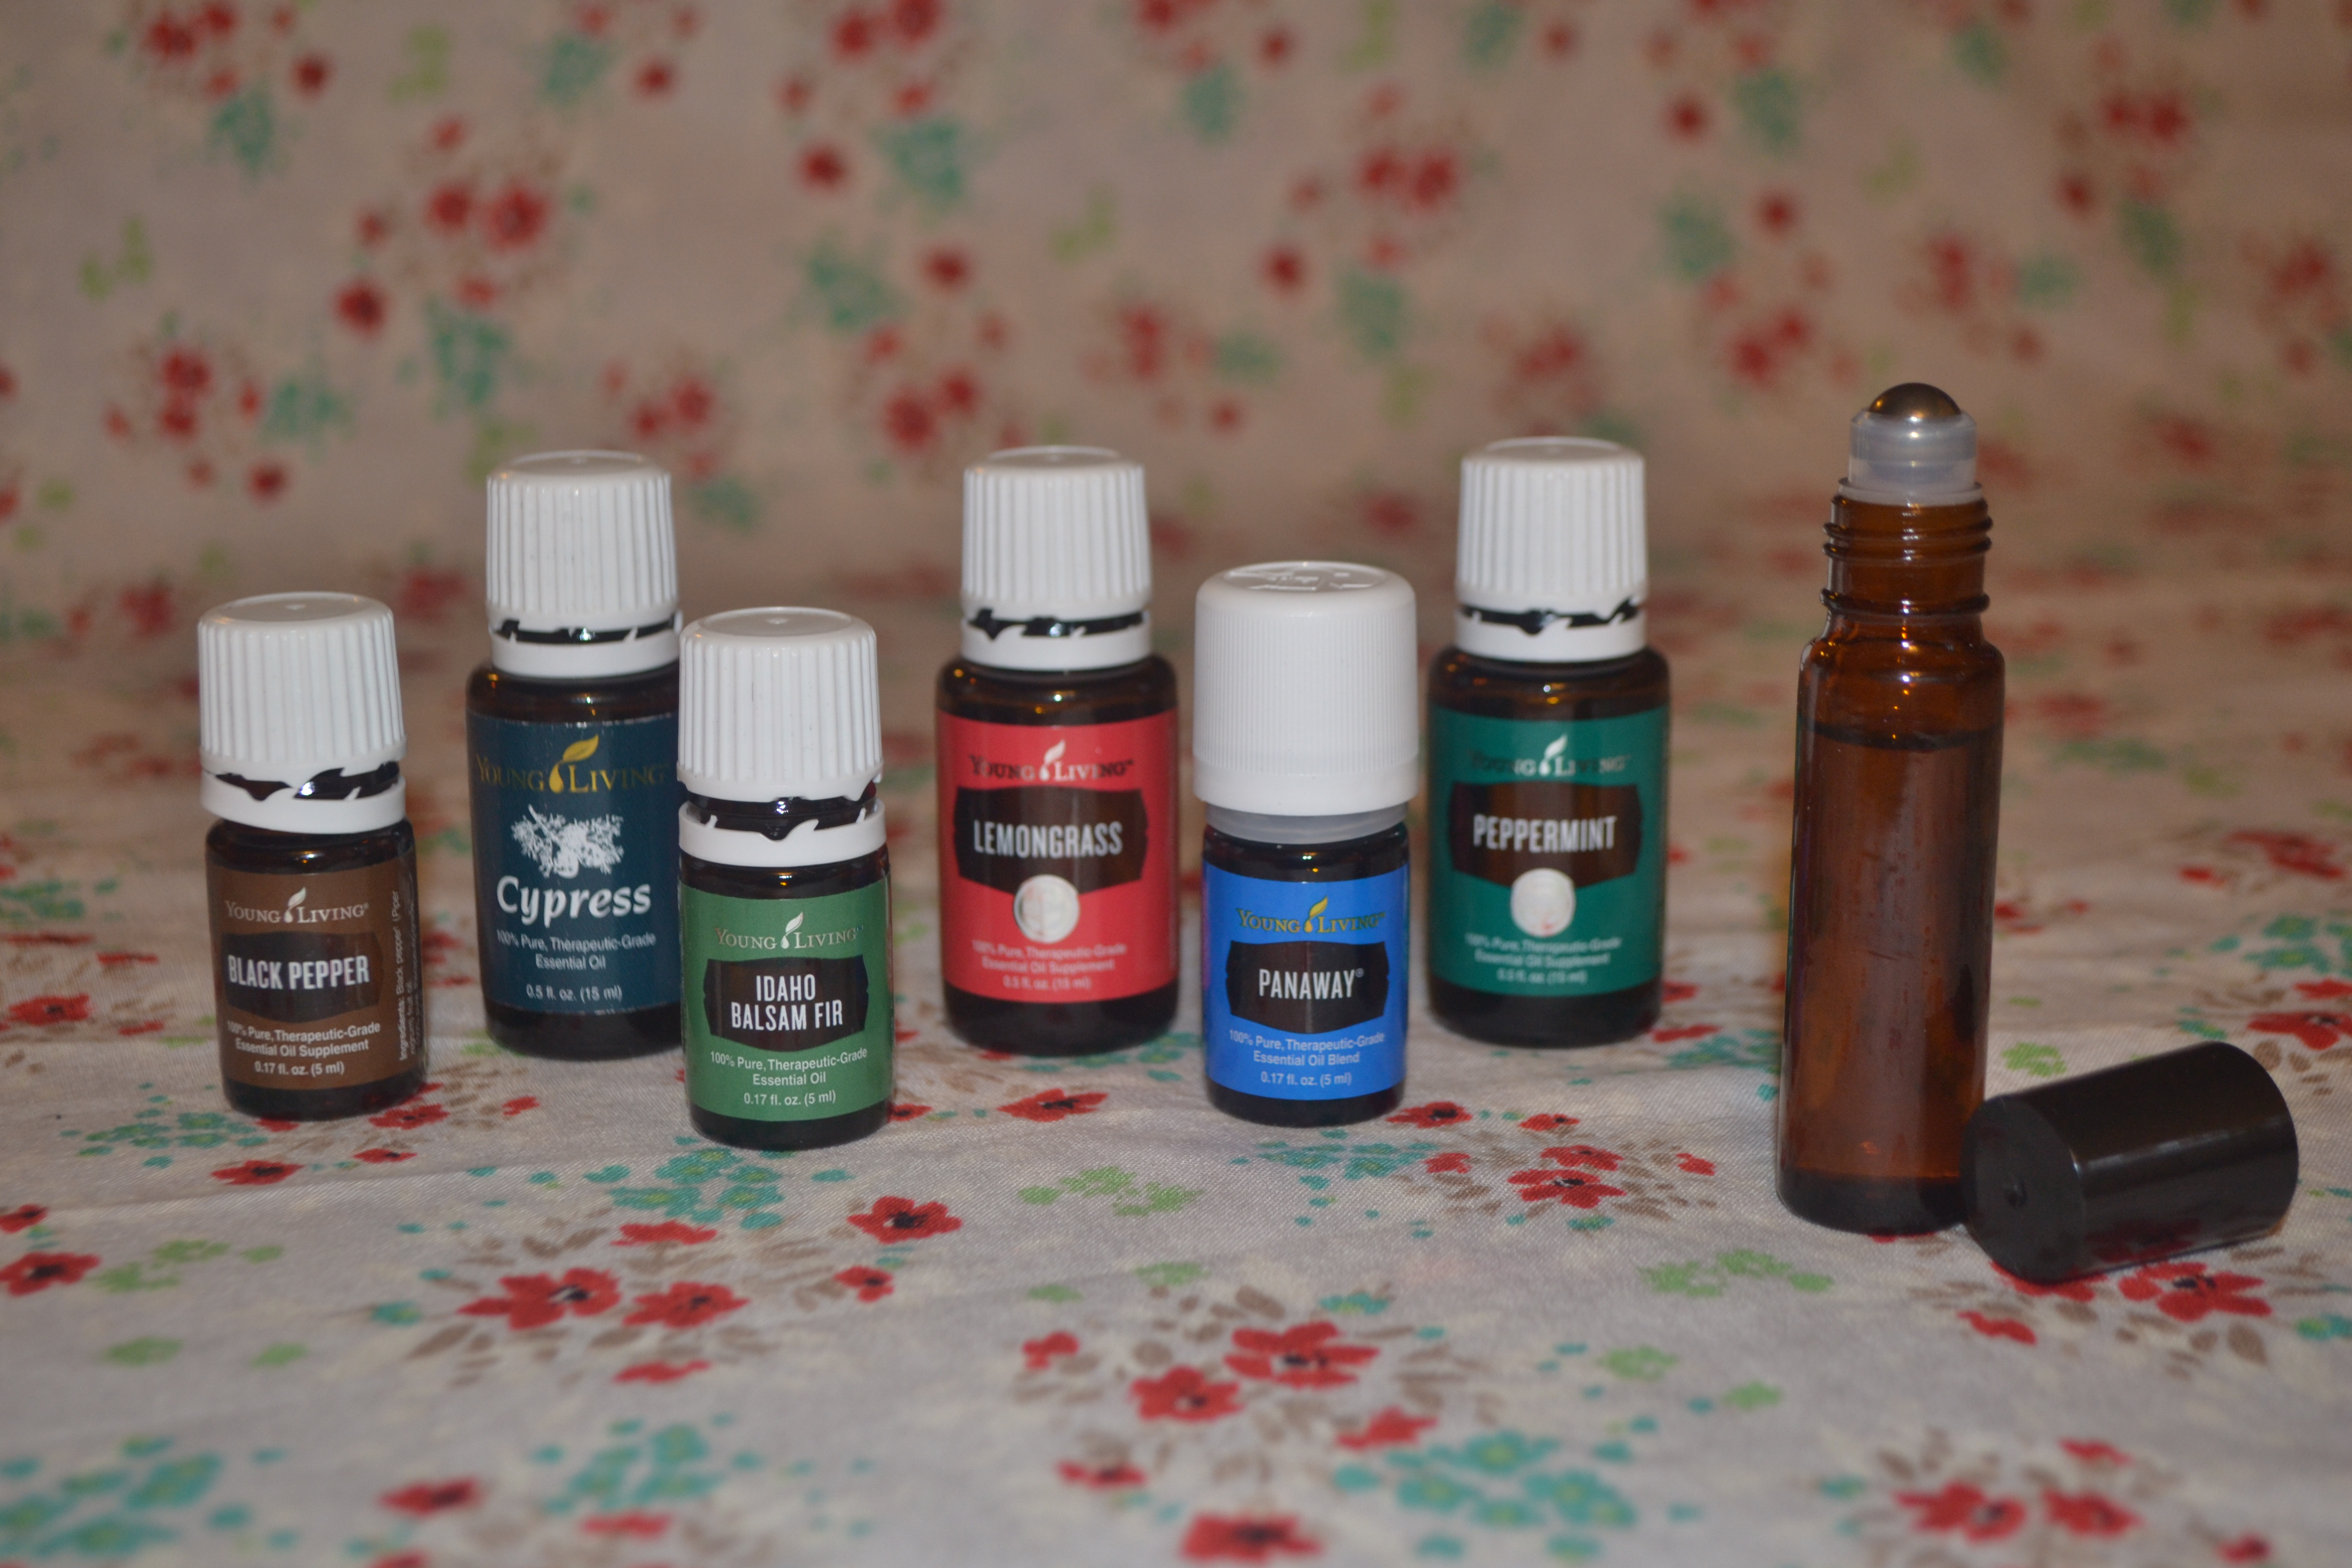 As and active family of seven, you can imagine how many muscles aches we have in our house. Whether the kids have growing pains, muscle injuries from wresting meets and volleyball tournaments, I felt that I was constantly giving them over the counter medication. Luckily for me a friend introduced me to Young Living Essential Oils. Now, let me explain that I was EXTREMELY skeptical of what I thought was a ‘tree-hugging hippy’ waste of my time. Well, call me a tree-hugging hippy, (please don’t) but I was amazed at how fast I was able to bring relief to my children as well as myself!

